Uniform embroidery must withstand frequent wear, repeated laundering, and close inspection, yet dense stitching can pull garments out of shape. The right Embroidery stabilizer counters that pull by supporting fabric, controlling movement, and preserving clean outlines. Matching stabilizer type and weight to the garment and design helps prevent puckering before stitching begins.
Stabilizer choices that prevent puckering in uniform embroidery
Every needle penetration draws fabric toward the design, and closely packed stitches intensify that force. Fabric stabilization gives the material support, reducing movement that can wrinkle edges or distort lettering.
For uniforms, the choice depends on fabric stretch, garment weight, stitch density, and the design’s placement. No single backing suits every shirt, jacket, or workwear fabric.
Stabilizer types for uniform fabrics
A Tear-away stabilizer suits stable woven fabrics, such as many cotton uniform shirts. It supports stitching, then tears away after embroidery without leaving permanent backing.
A Cut-away stabilizer offers lasting support for knits, polos, and other stretch fabrics. It stays behind the design, helping the stitches retain their shape through wear and laundering.
A Wash-away stabilizer works well with sheer materials or freestanding details. For many uniform designs, however, it cannot replace the lasting backing that stretchy garments need.
Slippery fabric can shift under the needle, so a fusible stabilizer on the wrong side can help secure it. On textured garments, a water-soluble topping can keep stitches visible above the surface.
Choosing the right stabilizer weight
The stabilizer must be strong enough to support the design without making the finished garment unnecessarily stiff. Lightweight fabrics generally need less backing, while heavy workwear and dense logos may require firmer support to prevent distortion.
Test the combination of fabric, needle, thread, and stabilizer before embroidering an entire batch. If puckering appears around the edges, check the hoop tension, stitch density, and backing strength rather than simply adding more stabilizer. Excessive tension can stretch the garment before stitching begins and leave wrinkles once it is released.
Embroidery techniques that reduce fabric distortion
Even a suitable stabilizer cannot compensate for poor hooping or an overly dense design. The garment should lie flat in the hoop without being stretched, and the backing should remain smooth throughout the embroidery process.
For stretchy polos, avoid pulling the fabric to make it fit the hoop. For jackets and thicker uniforms, check that multiple layers remain flat and that seams do not interfere with the stitching area. Adjusting the design’s stitch density and underlay can also reduce unnecessary fabric movement.
After stitching, remove excess backing carefully and inspect the garment before washing. Follow the stabilizer manufacturer’s instructions, particularly when using fusible or wash-away products. Consistent testing helps identify problems before they affect a large uniform order.
Hooping and Garment Preparation for Clean Uniform Embroidery
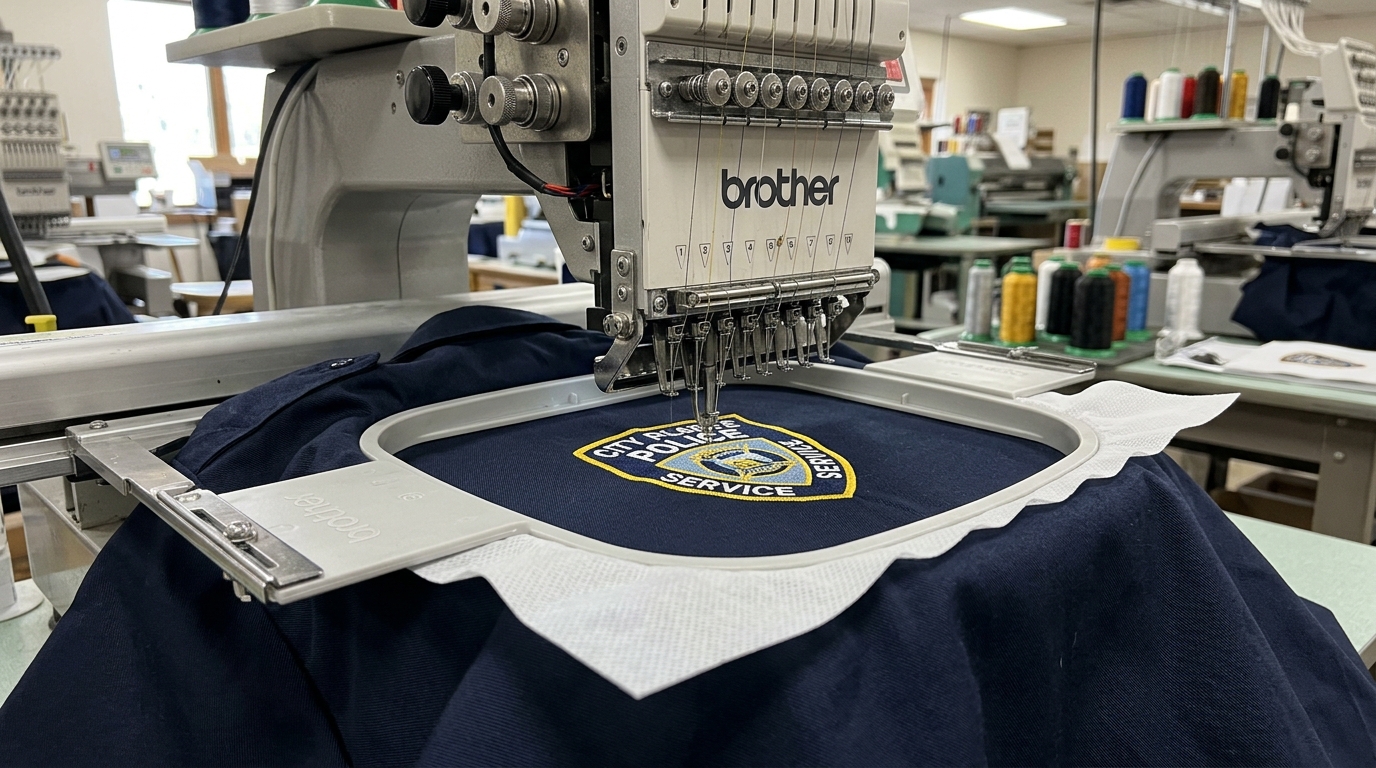
Stabilizer selection only works when the garment is prepared correctly before the first stitch. Uniforms often arrive with seams, pockets, collars, and plackets that sit close to the logo area, and each of these can cause fabric to ride up or shift as the design stitches out.
Placement and positioning
Start by marking the logo position with the garment laid flat, checking alignment against seams, buttons, and pocket edges. A design placed too close to a thick seam may sit unevenly and pucker as stitches build up.
Hooping without stretching
The fabric should rest flat and neutral in the hoop. Pulling it taut distorts the weave, and the fabric springs back once released, leaving ripples around the finished design.
- Choose the smallest hoop that fits the design, which limits movement during stitching.
- Keep the garment grain straight so lettering does not skew.
- For polos and knits, float the garment over a hooped cut-away backing instead of forcing it into the frame.
- Use a hooping aid or adhesive spray to hold slippery fabric steady.
Pre-stitch checklist for common uniform fabrics
| Fabric | Preparation | Risk if skipped |
|---|---|---|
| Cotton twill shirt | Light hooping, tear-away backing | Edge waviness |
| Stretch polo | Cut-away backing, no pulling | Distorted lettering |
| Heavy jacket | Flatten layers, clear seams | Shifting and thread breaks |
| Slippery nylon | Fusible backing, fine needle | Puckering and slippage |
Reducing stress on the fabric
Press the garment before hooping to remove creases that could be locked into the stitching. Use a sharp needle suited to the fabric weight, since a dull or oversized needle pushes fibers aside and increases distortion. Keeping thread tension balanced also prevents the top thread from pulling the design inward.
For professional results across different garment types, consult a uniform embroidery specialist who can recommend the appropriate stabilizer, test stitch settings, and help maintain clean, durable logos through repeated wear and laundering.